 How to Smoke Baby Back Ribs!
Fully illustrated, easy and great tasting!
 So it's your turn to
grill or cook for the Fourth of July, Labor Day, Memorial Day, Guy Fawkes Day or just a summer cookout or Barby? Following these directions ANYONE can cook perfect smoked,
tender, moist baby back ribs dinner! These direction with ANY type of
smoker, The Big Green Egg, Weber, Brinkmann, Masterpiece, whatever type of
grill/smoker you have.
So it's your turn to
grill or cook for the Fourth of July, Labor Day, Memorial Day, Guy Fawkes Day or just a summer cookout or Barby? Following these directions ANYONE can cook perfect smoked,
tender, moist baby back ribs dinner! These direction with ANY type of
smoker, The Big Green Egg, Weber, Brinkmann, Masterpiece, whatever type of
grill/smoker you have.
Ingredients and Equipment
- Baby back ribs - These are typically sold in packs of 3 racks at Costco, Sam's Club, etc. Thypically the cost about $3 per pound. If you didn't know, they are pork ribs, and tend to be
more tender than other cuts. You can easily get them in North America and Germany, but they are still fairly rare in the UK. But your UK butcher can
order them from Germany (I've done this several times). You can of course, use other cuts of ribs, such as short ribs, or even beef brisket,

- Seasoning or herbs: Any dry BBQ season is fine, I use Old Bay seasoning.
- Smoking wood - about 10 lbs. I prefer hickory, Texans like Mesquite, for a light flavor use apple, cherry or peach. Costco sells pellets which are convenient and easy to refill in the smoker.
- Meat thermometer. I prefer a remote instant digital thermometer, since you do note need to open the lid (which lets out heat) and you can stay inside your house and monitor progress!
- Smoker - these cylindrical smokers are usually available Home depot, Lowes, and WalMart for under $30. Come brands are Weber, Brinkman and The Big Green Egg.
- Water to fill the water pan.
- Fuel: I place my smoker over a Bayou brand propane fryer base, so I can control the heat exactly and never need to refuel while cooking. Some people use an electric base. Others swear by charcoal, which I find to be messy and more difficult to maintain an even temperature. Whichever, you'll need enough fuel to last 4 to 6 hours.
- Heavy duty meat forks and oven mitt or gloves.
- Roasting pan or a huge pot or bowl to carry the cooked baby back ribs back into the house.
Step 1- Gather the smoker and other equipment
Get all the parts out and be sure to work on a fireproof surface, away from the house and anything flammable.
Step 2 - Soak the wood
Now is a good time to get your smoking wood soaking in water. But which wood? I prefer hickory, the traditional standard, but Texans often like Mesquite and there are others like apple, pecan and cherry. The last three woods have a very mild flavor though, and I find I get best taste with hickory. Whichever you use, you want to soak it in water for a few hours so that it smokes rather than simply burns!
 Step 3 - Rinse the baby back ribs
Remove any neck and giblets that were stuffed inside the baby back ribs - be sure to look in BOTH ends - often they put a gravy packet under the neck skin flap, and the giblets are inside the bird. You can save these and smoke them, too, if you wish. I'll pass...
Thoroughly wash the baby back ribs inside and out with cold water (nothing else) and drain it. Note: this is a good time to get the oven warming - set it for 325 F (and make sure there is nothing inside the oven first!)
Remember that uncooked poultry usually have bacteria like salmonella, so
thoroughly wash your hands, and pots, tools, or surfaces that come in
contact with the uncooked baby back ribs. Use hot soapy water and rinse a lot
on nonfood items (your hands, pots, etc.).
Step 4 - Remove the membrane on the back of the ribs
Why? Because it is a tough, tasteless rubber membrane. Occasionally, it is removed by the butcher, but not usually. I think the Costco's baby back ribs have it already removed, but Sam's Club's are still intact.
It's easy to do. Just work a blunt knife under the membrane on the back side of the ribs, and gently, but firmly lift it to stretch the membrane and separate it from the meat. Then work your finger under it and pull upwards and pull the membrane off the entire piece. It often comes off easily in one piece. Obviously, discard it.
Step 5 - Gather the seasonings
The seasonings are easy: I just use Old Bay. But you can use any BBQ seasonings, typically, salt, pepper, cayenne pepper, etc. .
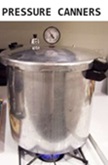
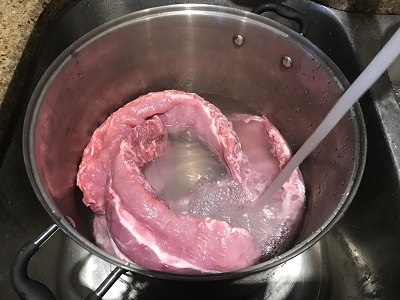
Step 6 - Dry Rub or Parboil the the baby back ribs?
Parboiling, which means cooking the ribs in water that is steaming but not quite boiling is no longer recommended by most professional barbecuers.
Instead most recommend rubbing seasoning on the ribs, all over. Old Bay is my preference, but you can use any seasoning mix you prefer.
Step
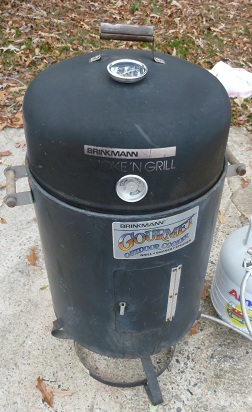
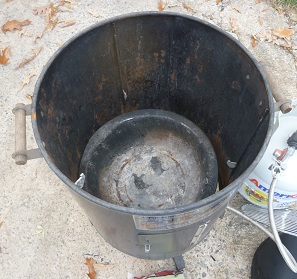
7 - Clean and prepare the smoker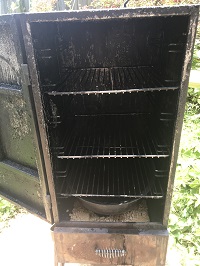
Here's a picture of a simple Weber / Brinkman smoker. Smokers typically come
in 3 varieties: charcoal, electric and propane. I take the basic inexpensive
($40) Brinkman or Weber charcoal smoker and place it over a turkey fryer base, which
makes it a propane fryer. The advantages of propane or electric over
charcoal are that you can control the heat precisely, you don't need to keep
adding charcoal, and they operate cleaner, with no dust or carcinogens
from the charcoal. But whatever your choice, clean it out with a scrub
brush and garden hose. I clean the grates inside with s teel wool, as that is
the only part that will come in contact with the baby back ribs.
teel wool, as that is
the only part that will come in contact with the baby back ribs.
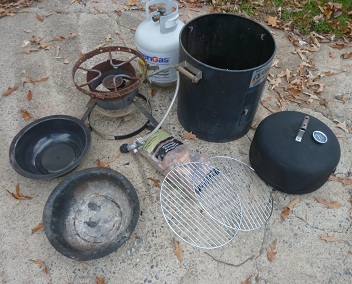
The photo at above right shows all the parts; clock wise, starting with
the 2 metal grates, then the wood pan which goes in the very bottom right
above the heat source, then the water pan, the propane burner base, the
propane tank, the smoker cylindrical body and the lid. You'll notice I
drilled a hole in the lid and added a precise dial type thermometer
(available from Home depot or Lowes) as the built in dial (warm - ideal -
hot) seems too imprecise to me.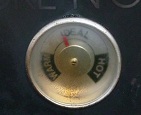
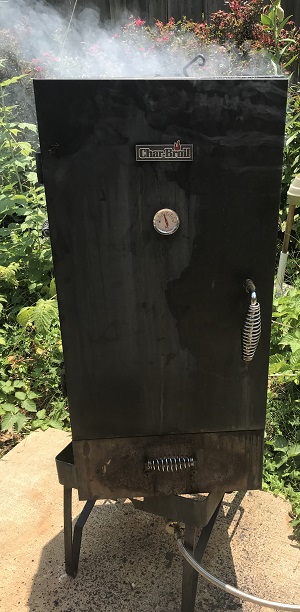
CharBroil and door-type smokers
I switched to using an upright rectangular Char-Broil (the rectangular smoker at right) that had its own propane source. The advantage is, the door allows you easy access while cooking. The Brinkmann required you to remove meats to get to those on lower racks.
But I found it produced too little heat to use in the winter, so I removed the legs and set it over the turkey fryer base. Works great now, summer or winter.
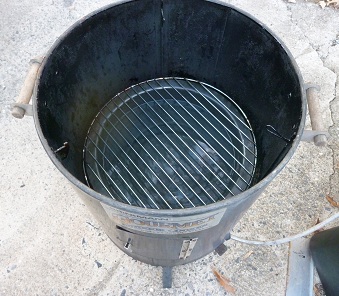
Step 8 - Assemble and start the smoker
Assembly is easy:
- Simply put the cylinder or other smoker box over the heat source base (charcoal, gas or electric),
- Put the wood pan or tray in, place a few chunks of wood in the pan,
- Then put the water pan in (empty). After the water pan is installed, fill it with water, up to about 1.5 to 2 inches from the top. You may need to top it up with more water later. The water pan must always be ABOVE both the tray of wood and the heat source,
- Place a grate or rack on the bottom shelf, usually
right on the water pan. Next put the lid or cover on the smoker and
fire it up. You can wait until after you put the baby back ribs in, but this
may save 10 or 15 minutes, and it doesn't get hot so quickly that you
would have trouble putting the baby back ribs in.

Heat sources, again:
As I said, I prefer using a propane turkey fryer base,
(like the
Bayou brand in on the
Amazon box at right) set under
Brinkman charcoal smoker (which you can often find on sale at WalMart or Home
Depot), with the
charcoal base removed.
It burns clean,
the heat can be controlled precisely,
one full 20lb propane can burn
for 10 hours or more, and is safer,
particularly if you use a braided
steel hose to connect.
And in the years since I started doing this, the manufacturers have started making propane-powered smokers. The Pit Boss, for example, gets very good reviews and is all you need.
But, some people use electric smokers, which aside from the potential risk
of
using it on a rainy day, are also safer than charcoal. I've found
electric smokers to be slower to heat up, and the elements will eventually
fail.
Charcoal... I just don't like it.
There is the risk of cancer
associated
with the soot, starting with lighter
fluids can be dangerous
and you
must continually add more charcoal
over the 4 to 7 hours while
you
are using the smoker. But, again,
it is your choice, and charcoal has
the cheapest initial cost.
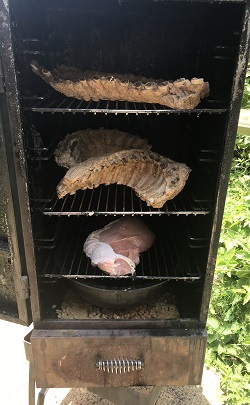 Step 9 - Put the baby back ribs in the smoker
Once you have the smoker assembled, remove the lid and set the baby back ribs place on the rack.
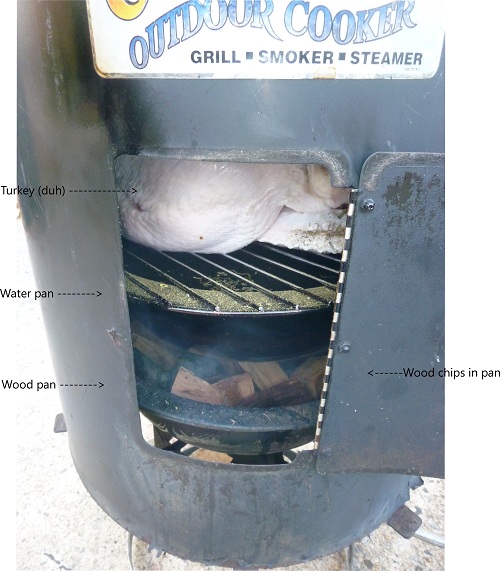
Notice you CAN mix and match meats. In the photo at right I have baby back ribs above a turkey breast. Obviously, the ribs, being a thinner cut of meat will be done hours before the turkey. You can smoke turkey, ribs, beef brisket, beef shortribs, a pork roast, chicken or other meats. The order doesn't really matter, although I will say I've found the smoker is hotter at the top than right above the pan of water. Since water boils at 212 F, the steam coming off it is... 212F. The heat that goes around the pan of water can be a bit above that., Overall, the smoker stays between 185 - 210 F if you have things working right.
Step 10 - Season the baby back ribs!
Sprinkle more of the seasonings over the baby back ribs!
Click here for related items on Amazon
Click here for related items on Amazon
Next insert the meat thermometer into the the meat.
 Step 11 - Smoke the ribs
for 3 to 6 hours
Step 11 - Smoke the ribs
for 3 to 6 hours
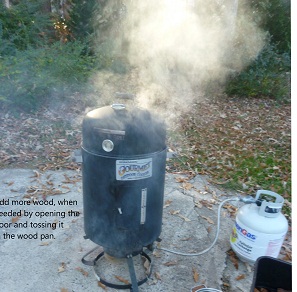
As the baby back ribs cook, you will need to add more wood chips / chunks.
Usually I add 4 or 5 pieces ever 45 - 60 minutes. You'll probably need
about 10 lbs of wood altogether for 4 - 6 hours of smoking. It's not an exact science, so it is better to
have too much wood, rather than too little. Just use the extra next
time.
Obviously, you want to keep the smoker operating in the ideal temperature range. If you are using propane or electric, just periodically check that the flame or heat hasn't gone out, and that the smoker is operating in the ideal range (185 F to 210 F). If the temperature rises much above 215, that may mean that you have either run out of water (DON'T let that happen) or your wood has caught fire. If the latter, use a spray bottle of water to quench it without creating too much dust.
My preference is to keep the smoker at 180 F to 200 F.
If you need add more water to the water pan, just take the lid off, and carefully fill the pan from above, to one side of the baby back ribs.
Baby back ribs are done when the meat thermometer reaches the following temperatures:
165 degrees F
Most authorities are now saying that once all parts of the baby back ribs reach 165 degrees F, it is safe to eat.
NOTE: I let them smoke for about 4 to 6 hours. Do NOT let the heat ride above 210 F in the smoker! Do not let the pan of water run low or out of water!
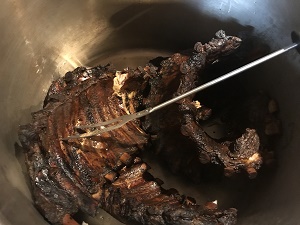
Step 12 - Remove the cooked baby back ribs
Anytime after the temperature of the meat thermometer reaches 165 F , the ribs are safe to eat. But I would say you need to give them at least 3
hours of smoking for a good flavor! Don't be surprised
if the baby back ribs are a dark brown, or even almost black - you SMOKED it!
It will still be moist and juicy, as long as you didn't let the water pan run
dry and you kept the temperature in the smoker between 185F and 210F!
Within two hours after roasting, store in refrigerator or freezer.
Refrigerator Storage: Use within three days.
Freezer Storage: Wrap in heavy foil or freezer wrap or place in freezer container. For optimum taste, use stuffing within one month and baby back ribs within two months.
- Looking for simple apple pie directions ?
- How about a pumpkin pie made from a fresh pumpkin, squash, or canned pumpkin?
- And for even more detailed turkey instructions see Clemson University's page!